I
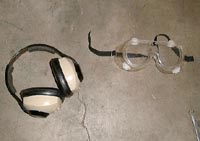
guess the first thing I should speak on is Safety. When working under a car ALWAYS wear
safety glasses. I know from experience that all sorts of loose stuff can get in your eyes
when you are under there working. Secondly when you are going to be hitting things it is a
good idea to wear ear protection too.
Now on to the project. As my Cutlass is approaching 150,000 miles
the steering is getting a bit loose so I decided to tackle the problem in three parts.
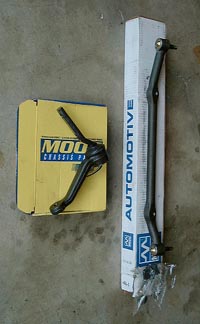
First I am going to replace the main Drag Link that connects the Tie Rods, Idler Arm and
Steering Arm and at the same time I will replace the Idler Arm too. This is the subject of
this installment. Secondly I plan on removing the steering box and either rebuilding or
having it rebuilt. Finally I plan on replacing the upper and lower Ball Joints.
My experience in the past is that the Drag Link and Idler Arm are
the first suspension member to wear out and therefore should be the first thing you
replace when trying to improve your steering response. The Tie Rods typically do not need
replacing unless they have not been maintained. However if you don’t mind taking the
car in for realignment it can’t hurt and will probably improve the steering response
too.
The tools that you will need in this first project are as follows:
Hydraulic Car Lift, Jack Stands (Sturdy), a forked suspension "Enforcer"
(pictured), a 3 lb hammer, small flat tipped screwdriver, a torque wrench, needle nose
pliers, and appropriate sized wrenches and sockets.
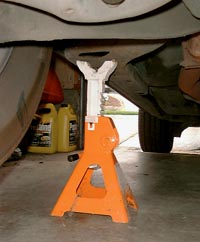
Jack the car up a high as you are comfortable with, place a couple
of sturdy car jack stands on the car frame where they will be stable and let the car down
on them. Be sure to make sure the car is stable before crawling under it and I would
always advise to have a friend nearby in case something were to go wrong ( I just like the
company). An alternative to this is to use car ramps, they will not provide quite as much
working room for you but will give an extra margin of safety. In any case Safety should
always be first. Never work under a car unless you are comfortable with the work
situation.
Now that the car is up, it’s time to remove the nuts holding
the Drag Link on. There are 4 nuts on the Drag Link. We will remove 3 as one is connected
to the Idler Arm which is also being replaced. First start by prying out the cotter pins
with your small screwdriver. Next remove the cotter pins with your needle nose pliers. Now
you can remove the nuts with a socket drive or a wrench. My nuts were 11/16th.
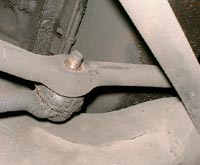
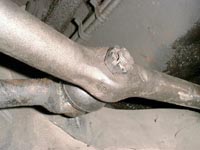
Now comes the fun part. Separating the Drag Link from the rest of
the suspension. This is where the "Enforcer" comes in. The suspension is pressed
together so it takes considerable pressure to separate the parts. Slip the fork of the
"Enforcer" between the Drag Link and the Tie Rod and using the hammer drive the
fork in until the two separate. Be careful not to puncture the seals on the Tie Rods.
Repeat on the other Tie Rod and on the Steering Arm.
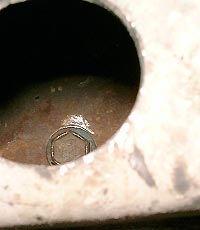
Now that the Drag Link is free it’s time to remove the Idler
Arm and the Drag Link that is still attached to it. The Idler Arm is held on with two
bolts that are accessed through the frame. Mine were ľ inch bolts. You will need an
extension to get your socket inside of the frame and a wrench to hold the nut. The nuts
are held on with a locking thread compound so it takes a bit of time to get the nuts off.
Now that the nuts are off you can twist the assembly out from under the car. Be very
careful not to push the bolts back into the frame cavity, but if they do fall in as one
did for me, just use a screwdriver to push them over to where you can grab and pull then
out.
Basically the next step is to reverse everything you just did. First
I put on the Idler Arm and cinch up the bolts. I found that upon re-installing the Drag
Link I needed to push the Tie Rod ends through before pushing onto the Steering Arm shaft
and Idler Arm shaft. It is a bit tricky but not to difficult. Be sure that the seals are
in place on each of the shafts. Once everything is in place you put on the nuts and torque
them to manufactures specifications. In the case of my car it was 40 ft lbs on the Tie Rod
shafts and 35 ft lbs on the Idler Arm shaft and Steering Arm shaft. Install the cotter
pins and lube the chassis.
Now drop the car down and test drive it. I found that my cars
response was improved but on the freeway the steering gear was still to loose. So my next
step will to be to remedy that mater. Stay Tuned.